How-To Guides
Deposits
Deposits
How to take and redeem deposits in Memsec7.
A standard feature of Memsec7 which many sites find useful is the deposit function. This allows you to take a down-payment for a future event or purchase. Deposits can be recorded either in the till, where the funds are paid in cash or card by the customer in person, in the back office if the customer pays by transfer or over the phone, or online with bookings. Each deposit has a function date associated with it as well as other details such as number of guests, contact details for the person paying the deposit and freehand notes.
To access the deposit features on the till, log in and press ‘Menus’. Pressing the ‘Deposits’ button on the menus screen will display a list of options;
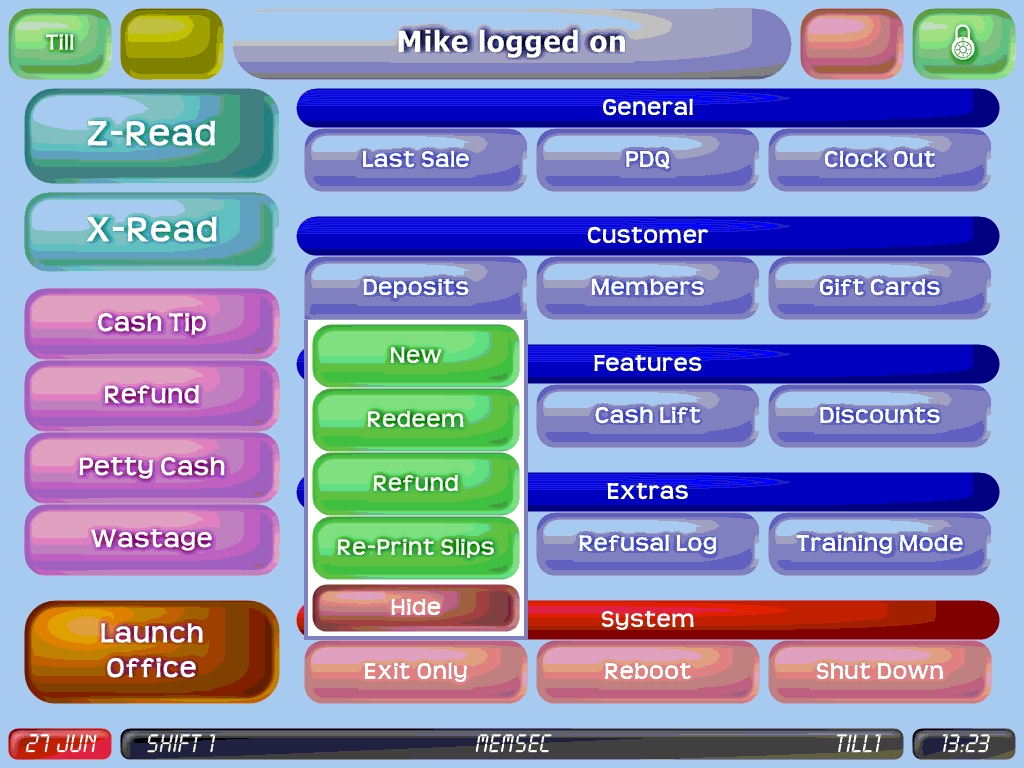
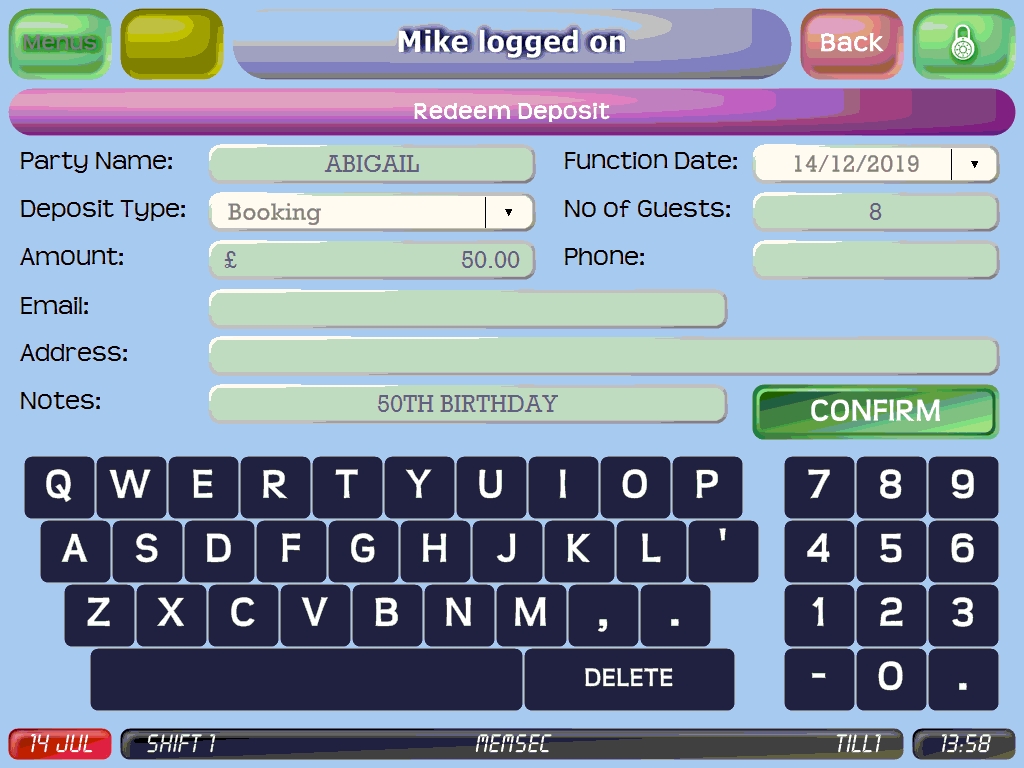
To add a deposit, press’New’. Below is the till screen you’ll see;
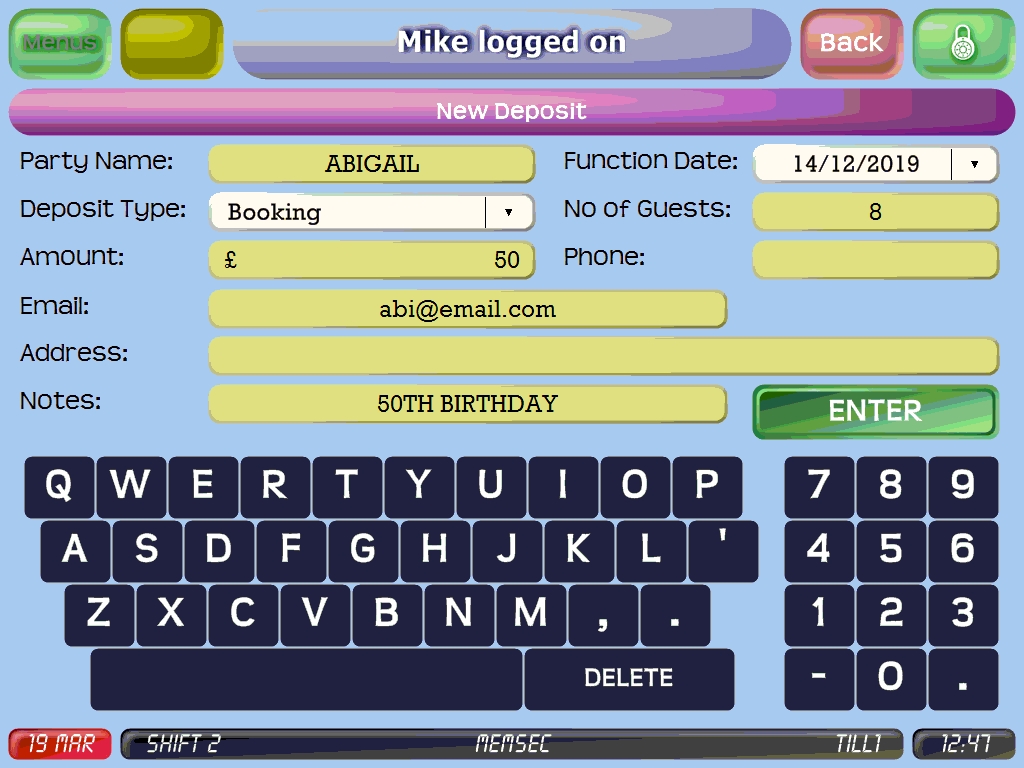
Once the relevant details have been completed, pressing enter will take you to the payment screen. Once the payment has been recorded deposit receipts will be printed. By default there are two copies, one for the customer and one for the site, but if necessary additional copies for third parties or different departments can be specified. A deposit receipt looks like the below.
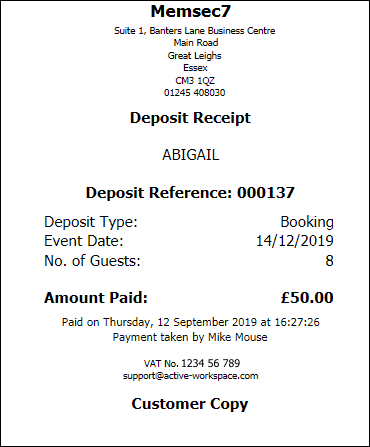
Whether you insist on customers producing their deposit receipts in order to redeem them is of course entirely at your discretion. Deposits can be directly redeemed or refunded from the same menu drop-down on the till but more commonly they’ll be assigned to a tab on the system. To do this, simply view the tab and select the option ‘Apply Deposit’. This will bring up a list of all deposits outstanding on the system together with a search box.
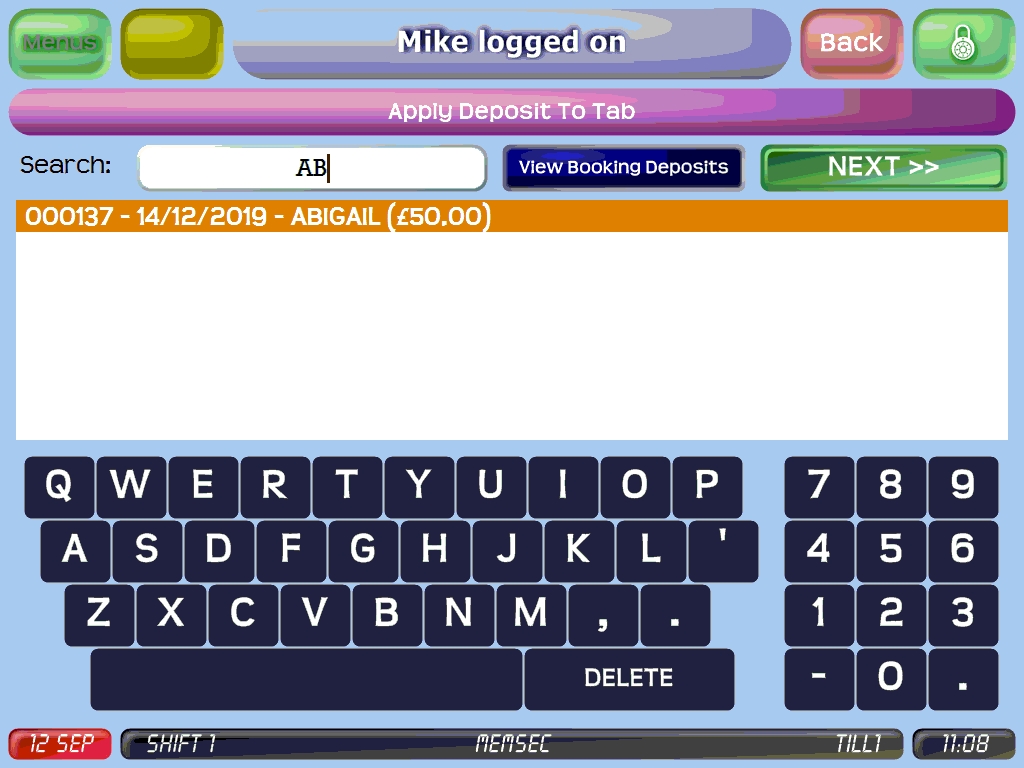
Once you select the required deposit the ‘Next’ button will become enabled. Clicking that will show a confirmation screen where you can check the full details of the deposit before applying it to the tab.
Once applied to the tab, the deposit can be viewed at the bottom of the list of items, and will appear similarly on the bill when printed;


The bill can then be cleared by payment of just the remaining balance (e.g. £221.00 in the example above) as the deposit has reduced the overall total.
The other options on the till Deposits menu, Refund and Re-Print Slips, also use the same selection and confirmation screens as shown above. If you select the refund option, you’ll be taken straight to the pay screen to process the refund when you press ‘Confirm’. The Re-Print Slips option replaces the Confirm button with a Print option, which will print the slips to the reciept printer.
Deposits can be managed, edited, refunded and even added via the back office program, under Till>Till Features>Deposits. Please be aware that this screen can take a little while to load, particularly if you have a large number of deposits on your system.
You’ll first see a screen like this, showing all outstanding deposits on the system, together with a summary of the number of deposits and total outstanding amount;
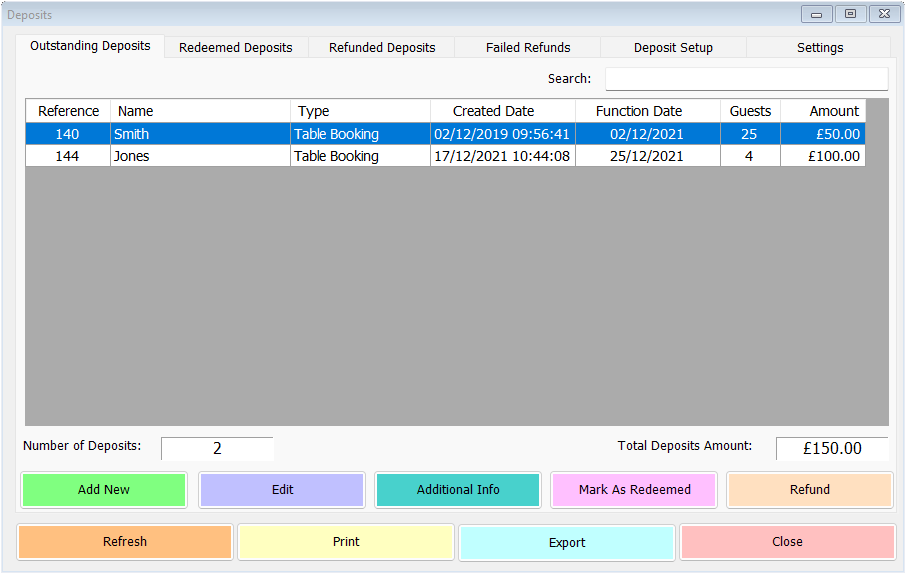
Above the usual Print, Export and Close buttons there are options to Add New, Edit, Additional Info, Mark As Redeemed and Refund. There is also a refresh button, which you can use to update the screen if you make changes.
Clicking ‘Add New’ will show a screen like the one below – simply complete the details and click ‘Save’ to add a new deposit to the system.

Unlike deposits added to via the till, those added in the back office are assumed to have been paid elsewhere so the funds from the deposit payment do not have to be added to the till drawer. When a z read is next performed on till 1 any deposit added via the back office will be included in the reports but will show as having been paid elsewhere.
Clicking ‘Edit’ on the main deposit screen will display the same form, with the deposit reference filled in, allowing you to alter or add details other than the amount.
‘Additional Info’ shows a separate screen like this;
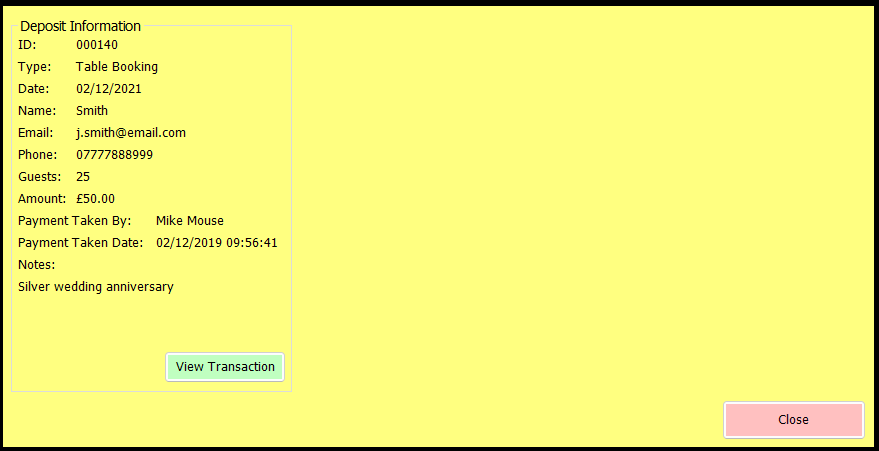
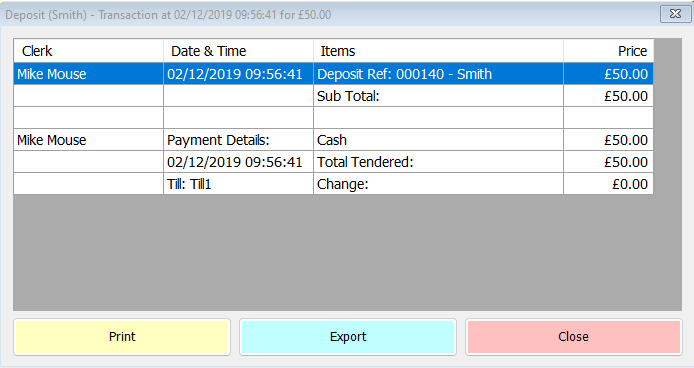
This shows the deposit ID, type, function date, name, email, phone number, number of guests, amount, who took the payment and when, and any notes. By clicking on ‘View Transaction’ you can see further details of the payment, including the payment method;
Sometimes a deposit will be paid but never redeemed or refunded. If this happens, you can remove the deposit from the list of available deposits using the button ‘Mark As Redeemed’. Answering ‘Yes’ to the confirmation message you’ll see will remove the deposit from this list, and therefore from the list of deposits avaiable on the till, without assigning it to a till transaction or expecting the funds to have been used or repaid. You’ll then be able to find it instead in the Redeemed Deposits list.
If you wish to refund an unused deposit without using funds from the till drawer, the ‘Refund’ button here will facilitate that. First, you’ll be asked to confirm that you wish to refund the deposit, with the details shown to ensure it’s the correct deposit;

If it’s a deposit that was paid by the customer online while making a booking, an attempt will be made to automatically refund the deposit to their card. Otherwise, you’ll see this message;
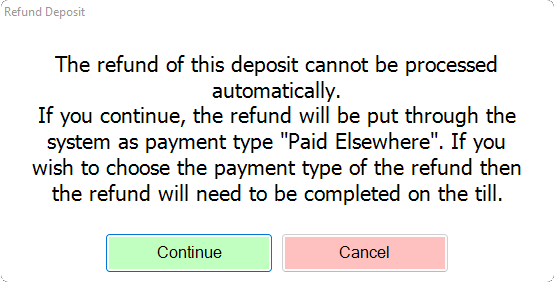
As this suggests, if you complete the refund here it will mean the selected deposit is marked as having been refunded with the outgoing payment again being treated as happening ‘elsewhere’ from the till zread perspective. To refund cash or card, refund the deposit on the till.
This tab displays all historic deposits that have been redeemed on the system.
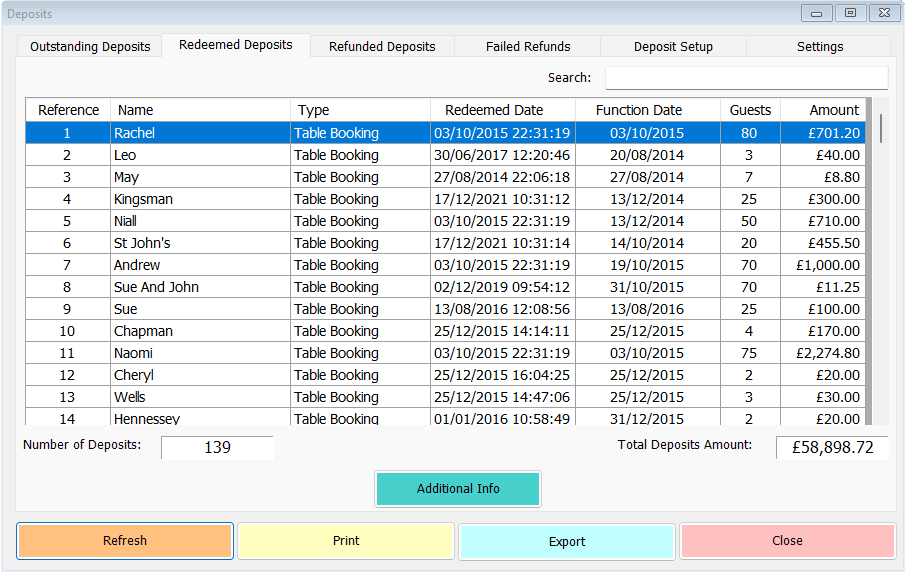
The Additional Info button is again available, and again there’s a figure for the total number of deposits and total amount. Clicking the Additional info shows a similar screen to the one from the outstanding deposits tab, but with a second section detailing the redemption date, time and who took the payment. Again there’s a button to view the details of the redemption transaction.
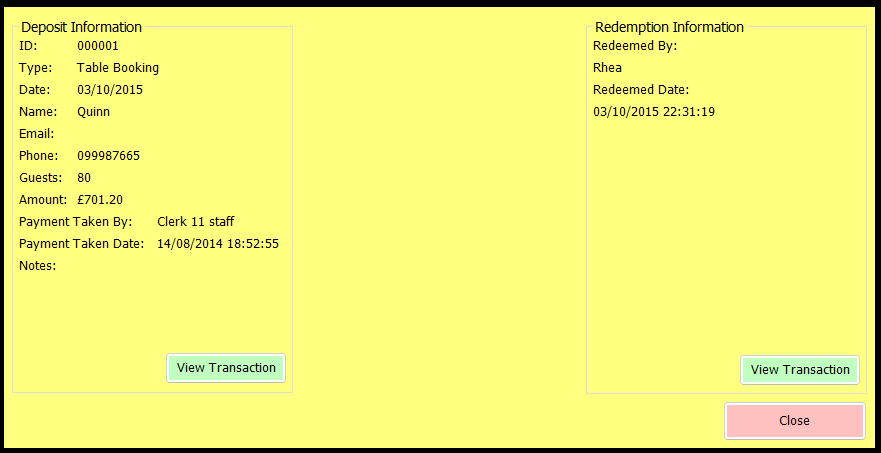
As with the redeemed deposits, this list of deposits that have been directly refunded rather than redeemed has the option to view total numbers, total amount and the Additional Info button allows you to view details of the deposit being made and refunded with the option to view both types of transaction.
Where deposits are paid with bookings online, they can be set to be automatically refunded if the customer cancels with sufficient notice. However, this process relies on numerous internet connections and so needs a failsafe, which this tab provides. If any deposits appear in this list (again there are options to view totals and Additional Info) there’s another button on this tab, ‘Retry Refund’. You’ll be asked to confirm that you wish to retry the refund and if you confirm the system will again try to use the stored payment information to return the deposit to the customer. If it’s not possible to automatically refund the deposit, you’ll be advised to manually refund the customer through the till or your PaymentSense/Dojo app. The system will then mark the deposit as having been refunded with a payment type of ‘Paid Elsewhere’.
The penultimate tab on the deposits form is the Deposit Setup tab. Here you can manage the deposit types and receipt types used in your system.
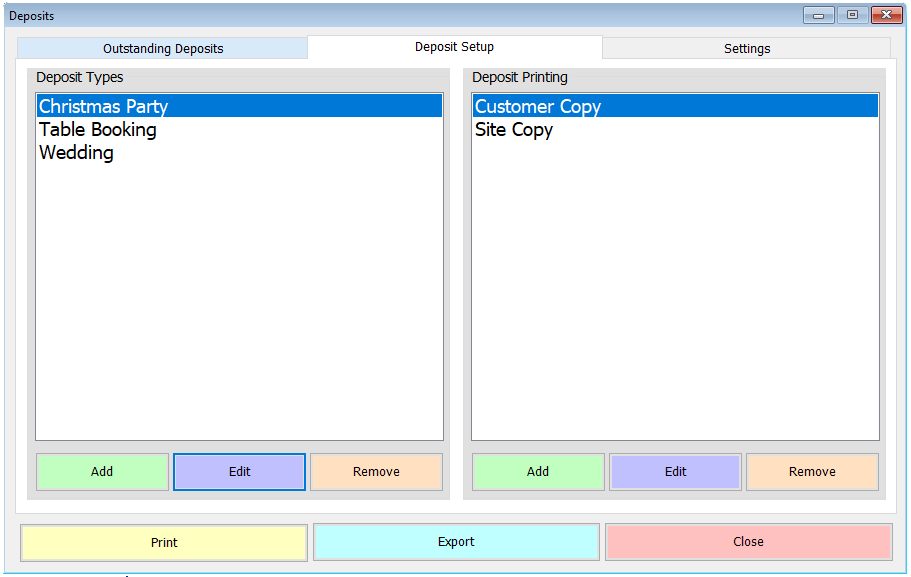
Deposit types allow you to differentiate between deposits paid for different purposes. Use the Add, Edit and Remove buttons to manage your deposit types.
Deposit Printing settings allow you to manage the receipts printed by the till when a new deposit is recorded. The default is to have the two receipts, Customer and Site copies, but you can add as many other types of receipt as necessary – for example an Accounts copy, or a Kitchen copy. Again, there are dedicated Add, Edit and Remove buttons (though there has to be at least one receipt type).
On the settings tab you can choose which fields are required when taking a deposit on the till.

It’s usual to require at least one means of contacting the customer, either phone or email, but you can also ensure that an address is recorded, and/or the number of guests, to help with planning.
There’s also the option to have an automated email sent when a new deposit is recorded. You can configure an email template under General>Email Settings>Templates. See our help guide on email templates for more assistance. Once you have created a template under the Deposits section there, it will be added to the email template list in the above screen and you can then select it here and click ‘Save’. As long as a valid email address has been recorded for the customer they’ll receive confirmation of their deposit via email.
